Hey everyone,
Today I’m going to talk you through a really simple vampire makeup tutorial. If, like me, you plan to go all out on Halloween and by the 30th October you still don’t have a costume, fear not. This vampire makeup tutorial will stop you frantically running around the costume shops on the eve of Halloween and ending up dressing as the Holiday Armadillo like Ross from Friends!
Vampire Makeup Tutorial
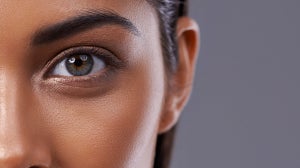
For this look we’re going to be focusing on quite a dark,vampysmokyeye, so for that reason I would suggest doing your eye makeup first before your base. That way, if you get any drop down from your eyeshadow (which is likely) you won’t need to worry about wiping away half of your base to tidy it all up.
Eye Primer
To start this vampire makeup tutorial, begin by priming your eyes with Blinc eye shadow primer. When you’re applying a lot of color to your eyes, eye primers are so important. Firstly, for creating a smooth, blank eye canvas, secondly to ensure your eye makeup adheres to your eyelid properly and lasts all day and last but not least, to stop any natural oils coming through and smearing your perfectly placed eye shadow. If you haven’t used it before it’s a makeup game changer. I’m a huge fan!
I based this vampire makeup tutorial around The Balm's Nude Dude Eyesahdow Palette, simply because the application is flawless and the colors are perfect for this look. To simplify the makeup on the eyes I really focused on using 3 main shades- ‘Funny’, ‘Friendly’ and ‘Fierce’ - possibly how I would describe myself at times!
Use a fluffy blending brush to apply the matte red shade, ‘Funny’, into and slightly above the socket of the eye. This will be your transitional color.
Next, use a separate brush to add some of the shade ‘Friendly’ deeper into the socket and work on a gradient between the two shades. You should see the two different shades but should be blended together seamlessly.
Now for the body of the lid, pack on the darkest shade out of the 3 shadows, 'Fierce'. Pack this on with a flat eye shadow brush for placement and precision. Use the same brush you used to apply ‘Friendly’ to ensure the two shades are nicely blended.
To intensify the darkest color on your eyes, I like to add a bit of eyeliner. You can either use gel or pencil or anything that’s easily blendable. I find for this that the By Terry Stylo Eyeliner works best. The creamy consistency slides over the lid effortlessly. So simply do a thick line at the base of the lashes (it doesn’t have to be neat) and use your ring finger to smudge it out over the lid.
To add some extra drama, line your waterline with the By Terry Eyeliner and a little below the lash line too. Blend that out with some of the red-toned ‘Funny’ eye shadow we used earlier.
At this point if you want to add a wing to structure the eye a little more, try it with Elizabeth Arden Beautiful Color Bold Defining Liquid Eyeliner. Wing or no wing- either works in this vampire makeup tutorial.
Finish the look off with a few coats of the Perricone MD No Mascara Mascara for the ultimate vampy look.
For your base, in keeping with the vampire theme, opt for something a shade lighter than your natural skin tone. You may have something knocking around that you don’t use because its just a little too light for you, that will work perfectly. Think Bella in Twilight- she always looks a little pale and washed out. I wouldn't usually suggest using a lighter foundation, but it's perfect for channelling your inner vampire.
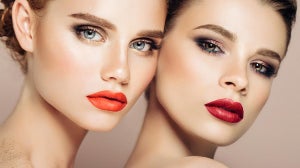
To compliment your smouldering eyes, we need to add a deep red lip. An ombre lip works perfectly for this look. To achieve an deep red ombre lip, apply some OCC Lip Tar in the shade Vintage to the entire lip area, focusing on the middle of the lips. This liquid lipstick is SO good! It has a wet-to-matte finish and is gorgeous to wear and it doesn’t crack or dry your lips out.
A lip liner will help to achieve that gradient, ombre lip tone. I used the Osmosis Colour Lip Pencil in the shade Sangria. Simply trace around your natural lip line using small strokes and build up the color to really define your lips. Once you outlined your lips, start to blend down towards the centre of your lips, stopping about half way down. Use your ring finger to blend the two shades together for the ultimate ombre lip.
And there you have it, the ultimate chic vampire makeup tutorial.
I love to see all your creations, so send them over via Twitter so I can have a little look.
Related Articles